Rubbing glitter into gel polish. How to make a manicure Mirror shine gel polish using rubbing
Every year there are more and more interesting ideas to make nails brighter and more beautiful. This time the novelty of the season is mirror rub. Thanks to this nail art, the manicure looks stylish and unusual. The execution technique is quite simple, so you can experiment at home.
Mirror rub for nails
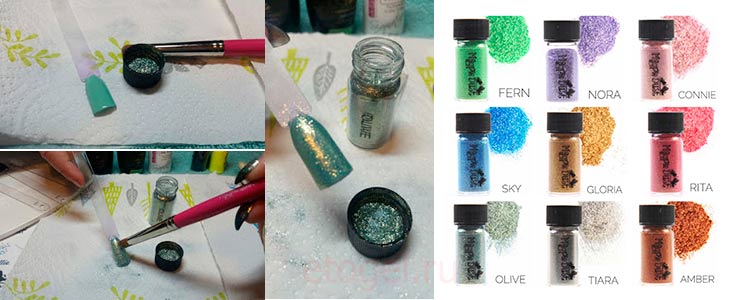
This is a special technique for applying loose pigment in the form of dust or powder by rubbing into a gel polish / varnish or gel coating. Powder / dust is sold in small jars with a ready-made applicator (as for shadows), which has 2 sides: a large and a small porous surface.
What are the advantages of rubbing a mirror shine?
- manicure turns out to be resistant and strong (holds well, despite external factors: water, Sun rays, solvents, cosmetical tools etc)
- beautifully reflects the light, nails look even brighter and more realistic
- very easy and fast to apply
- With this powder, you can create three-dimensional drawings
- without special efforts removed from the nail plate
- you can create both a chrome effect and a shimmery effect
- ahead of the quality of all known stickers and foil. What exactly? For example, the foil may not print in some places, and the powder / pigment fills the nail plate by 100%.
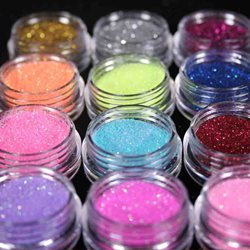
- Huge palette of mirror colors
- small particles / dust / pigment are securely fixed to the surface of the nail plate
- not high price+ low consumption
- using the technique mirror rub on gel polishes - the effect lasts up to three weeks.
Mirror rub. What is the application principle?
For work it is necessary to prepare:
- orange stick for cuticle treatment
- rubbing (small sparkles look like dust / particles)
- pusher / fan brush (included in the set along with rubbing)
- base + top coat
- gel polish any color
- UV/Led lamp
Step-by-step instruction:
- Step 1. With the help of scissors, a nail file and an orange stick, we prepare the nails for manicure: we give the desired shape and polish the nail surface of the nail. This must be done so that the varnish and rubbing are distributed in an even, beautiful layer. Otherwise, the design will turn out sloppy and vague.
- Step 2. Next, cover the nails with a base coat (only one, thin layer) and bring it under a UV lamp for 2 minutes or under a Led lamp for up to 30 seconds.
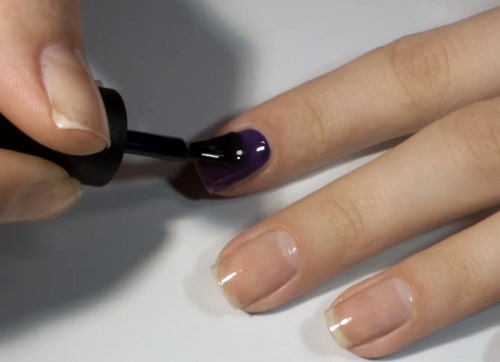
- Step 3. We cover the nail plates with a selected colored gel polish. Note: make several trial options for selecting the ideal color of varnish and rubbing. Why do it? The fact is that the final result can be completely different due to the “game” color palette. After applying - we substitute the handles under the lamp.
- Step 4. We apply a top coat on top (only without a sticky layer; be sure to consult the seller before buying). We place the nails under the lamp for up to 2 minutes (no more).
- Step 5 Now for the fun part. We take the applicator included in the pigment kit, collect some mirror particles / powder and carefully distribute it over the nail surface of the nail. Then in a circular motion We begin to rub all over the nail. Note if there was no special tool for rubbing, then the powder can be rubbed with your fingers - the result will be no less beautiful and spectacular. In the process, we work out all hard-to-reach areas and rub until a mirror nail comes out. The particles that remain - just move the brush.
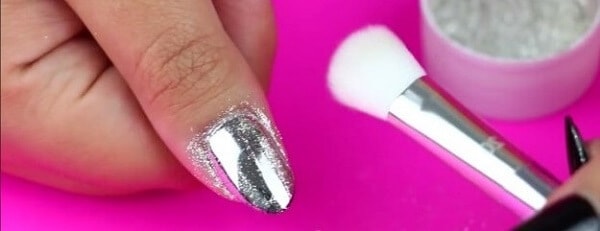
- Step 6. And the last final step is applying a top coat in two layers. If you want the effect to be more saturated, then the application of the rub can be repeated again in the same way (but as practice shows, a bright, mirror shine is obtained from the first application). Remember: to get a high-quality manicure, the nail plate must be absolutely even / smooth. If you skipped the grinding stage and bumps are visible, the mirror effect will only demonstrate all the inaccuracies.
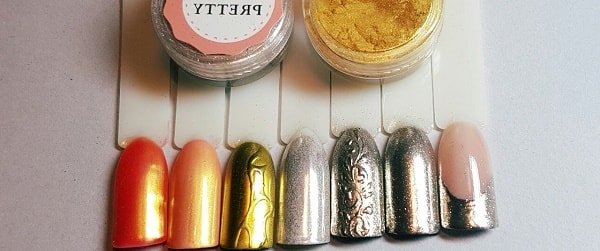
As mentioned earlier, the color of the varnish significantly affects the shade of the mirror powder. For example, if the main polish is pink + yellow powder, then the color plate will have a soft beige tone; when using red gel polish + yellow rubbing, the nails will turn out to be a gently coral shade. Here are some interesting combinations that can turn out in the end. Be careful and choose colors in advance! Also on the mirror surface of the nail, you can create wonderful patterns and prints using gel paints. Don't be afraid, experiment!
Mirror rub. Which company is better to choose?
You can buy a miracle mirror pigment in any online store or a specialized department for nail art. The cost is low, so "stock up" immediately with several boxes of different shades. Note: if you are new to this business, at first the material will be consumed very quickly, but over time, having “stuffed” your hand, a couple of “swings” will be enough and a shiny nail is ready!
- Avon / Avon. Pros: easy to apply, comes with a handy brush. Cons: manicure does not last long + after two days, all the brilliance of the pattern is lost.
- Zoya. Pros: high-quality products + manicure lasts up to six days. For getting desired result one layer is enough.
- Chanel. Pros: stays on the nail plates for a long time + looks beautiful. Of the minuses: rather high cost + difficult to apply on nails.
- Opi. Pros: very popular with girls, easy to apply + low cost. Cons: on the nails can sometimes turn out uneven.
- El Corazon. Pros: despite the liquid consistency - the varnish does not spread + lasts up to 4 days. Cons: peculiar stripes are noticeable on the nail plate + visually resembles a manicure with foil.
To make a mirror rub, take note of a few recommendations:
- buy a coating (top) without a sticky layer. Otherwise, get a manicure without a brilliant effect with a lot of lumps.
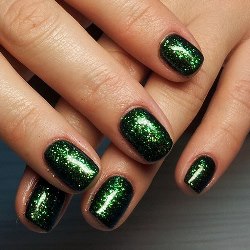
- to get a rich and juicy design - buy gel polishes in dark colors
- do not apply gel polish in several layers (manicure will look thick and rough)
- to achieve a delicate pattern - pick up varnishes in nude tones
- nail plates must be prepared - polished and even
- observe the drying time of gel polish. If the nails are overexposed after applying the varnish, then the mirror particles simply will not rub in.
- visible gaps and bumps on the nails? Then repeat the procedure again: cover the first layer (the one that is “imperfect”) with a top without a sticky effect and again apply powder pigment in the same way.
- it is necessary to rub the shiny powder immediately after drying the gel polish (the faster you do this, the better the manicure will look)
- to get an even more mirror-like manicure, apply a glossy top.
- rubbing in shiny powder / dust can be done with your fingers, a special sponge, brush or eye shadow applicator.
- do not rub the pigment strongly (otherwise you will erase the sparkles that have already stuck)
- before work, cover the surface with a newspaper or an unnecessary cloth, as small particles can “spray” all over the table.
- if you are applying micro glitter over regular polish, then wait until it becomes hard, but at the same time retains its tackiness. Say exact time almost impossible, since for each varnish this stage occurs in certain time. You'll have to experiment and "catch" the right time.
- never rub on uneven nails with flaws and defects, this will only emphasize the “sloppiness” of the nail plates.
- rubbing can be done on a regular varnish, gel polish (make it much easier and looks better) and gel.
As you can see, making a chrome pigment is not so difficult, the main thing is to prepare necessary tools and adhere to the basic rules of application.
![]()
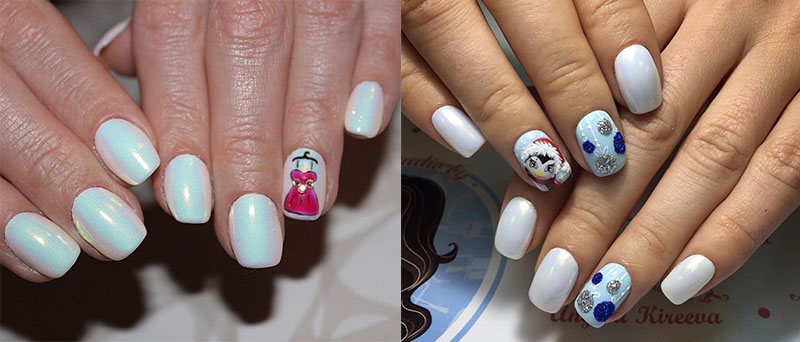
Mirror manicure options
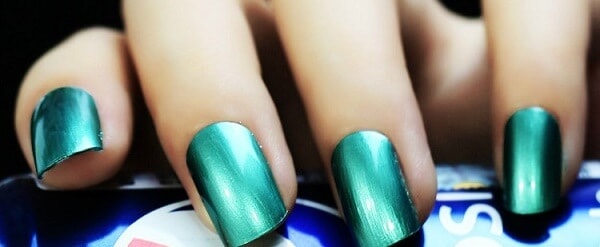
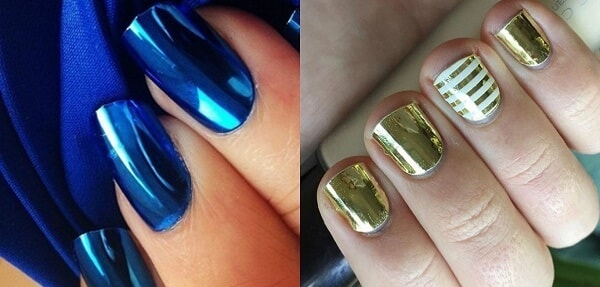
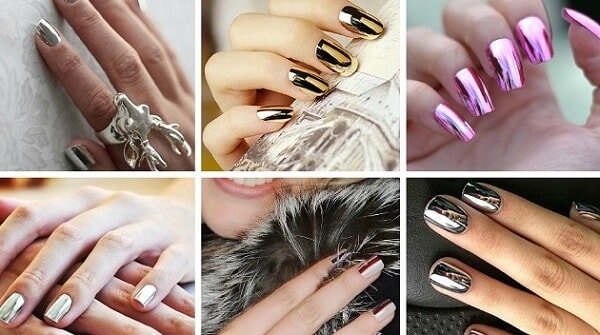
colored mirror nails
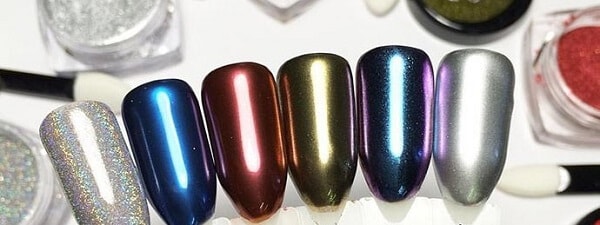
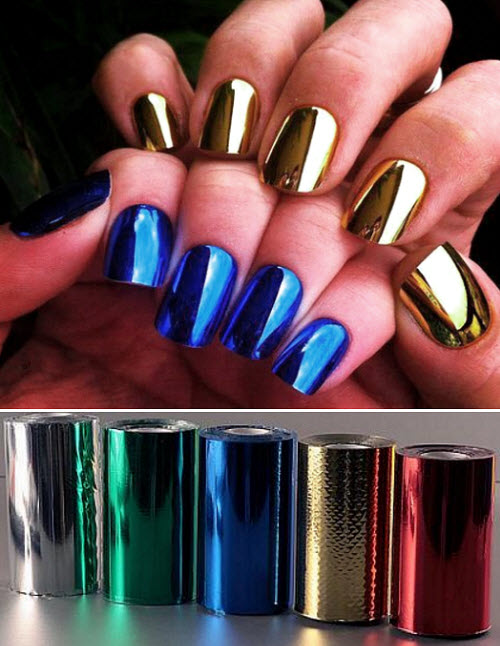
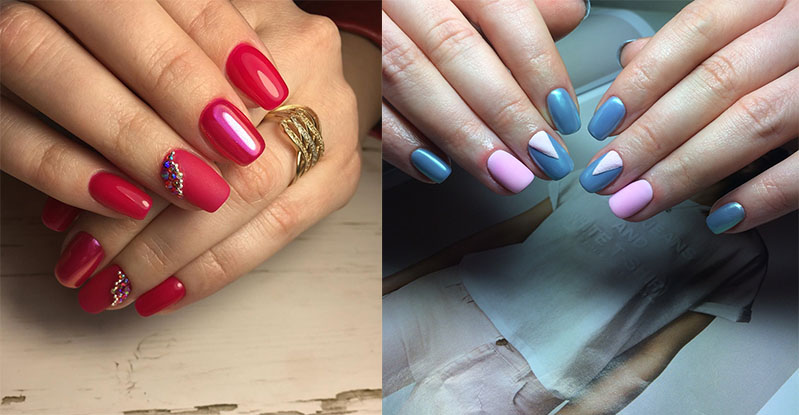
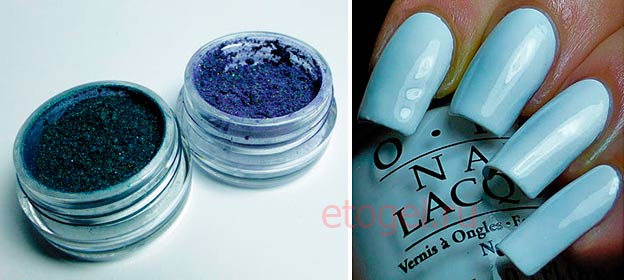
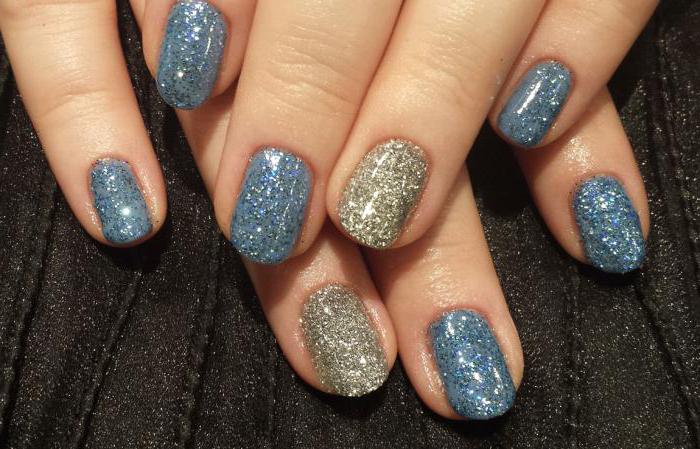
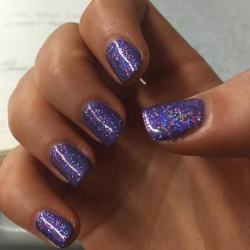
The most top shades are golden and silver. But you can "play" with other shades, no less spectacular: red, purple, blue.
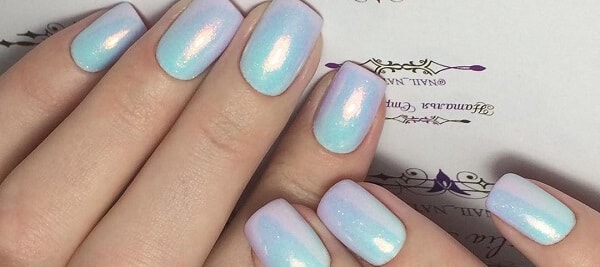
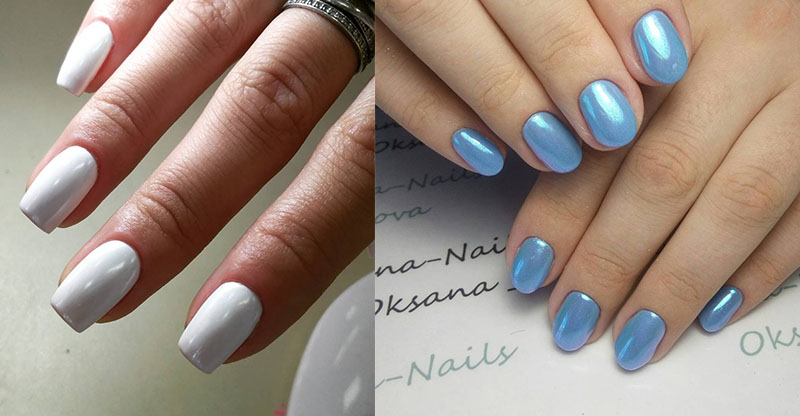
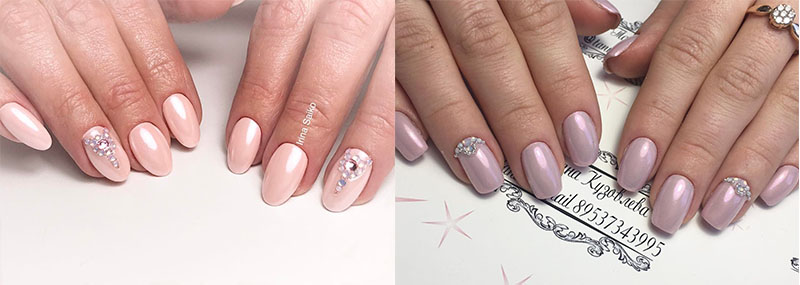
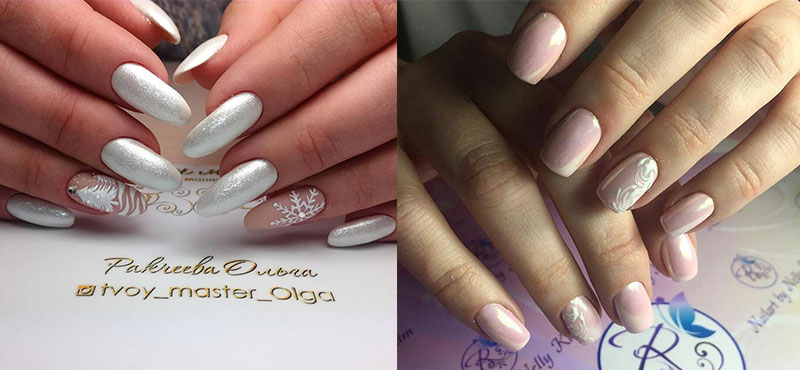
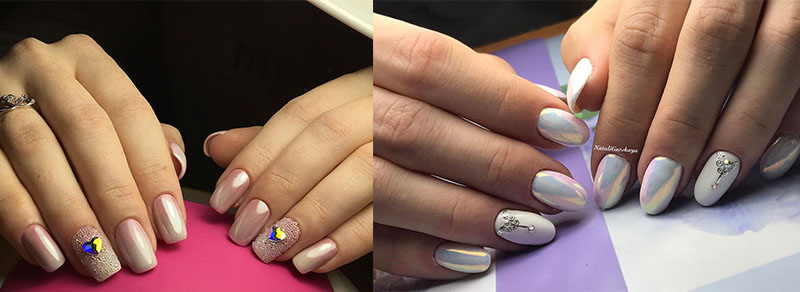
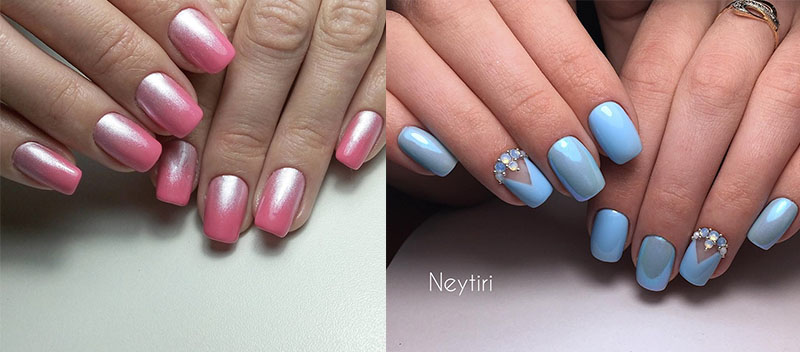
Pearly shine
To achieve a pearlescent effect, it is necessary to prepare a very fine shiny powder / dust - frayed and the base of a nude tone. After applying the gel polish, “generously” sprinkle with pigment and fix.
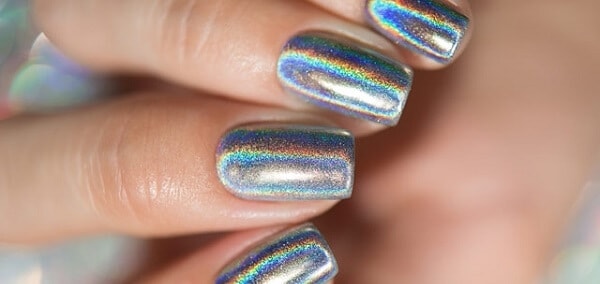
Holographic
For a holographic effect, take a pigment gray shade(shines like diamond dust). Pick up the main varnish in classic colors - black or white. Manicure will be rich and bright.
Prism
This version of the manicure is somewhat similar to the previous one, but there are still differences. Holographic - glitters shimmer distinctly, prism - they are almost impossible to see clearly. Reminiscent of the stains of gasoline on water. Remember this?
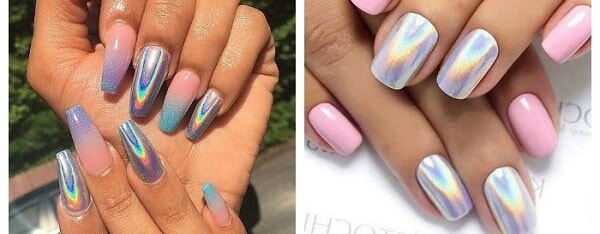
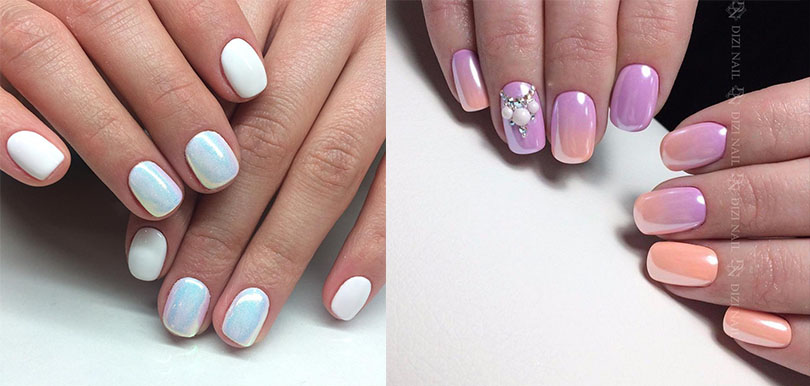
Shine
The provided nail art is very popular with girls. It is somewhat reminiscent of a prism, only the colors are deeper and more saturated.

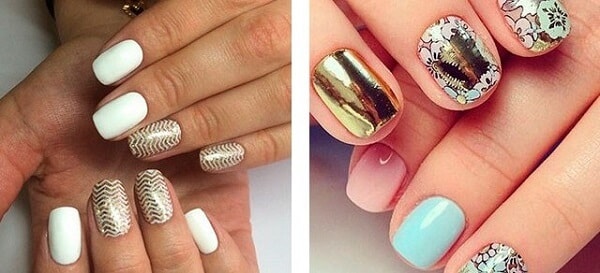
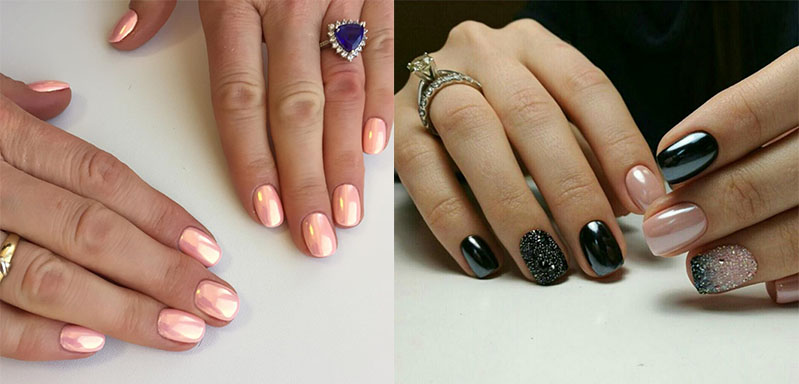
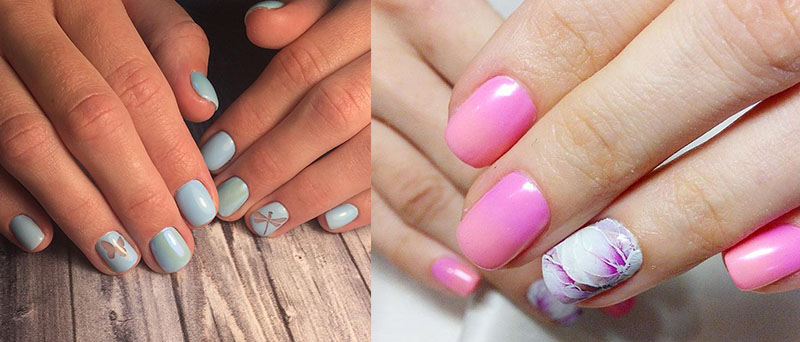
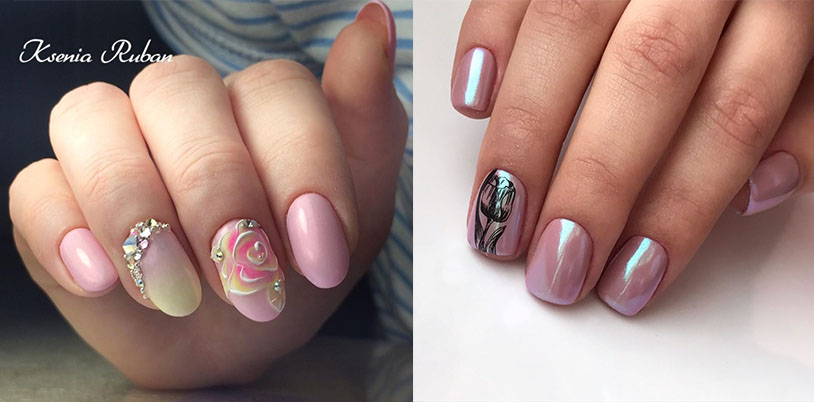
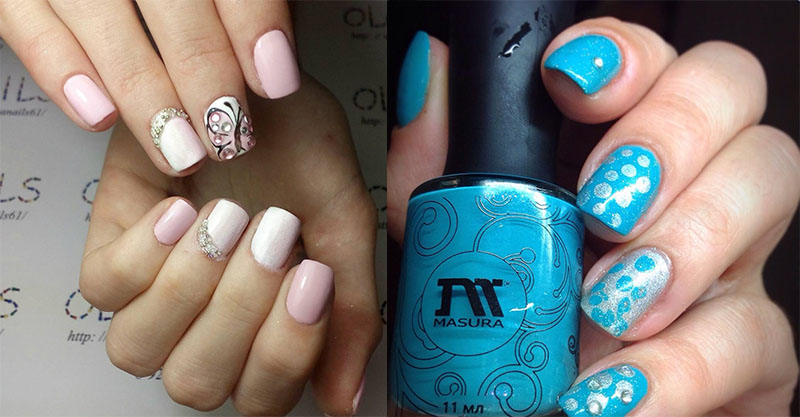
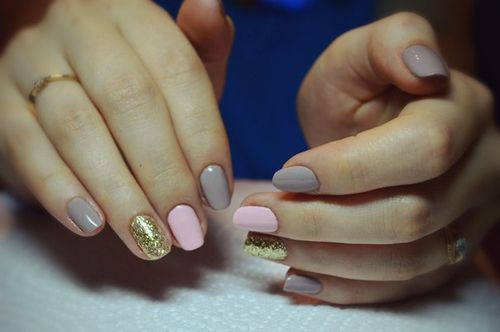
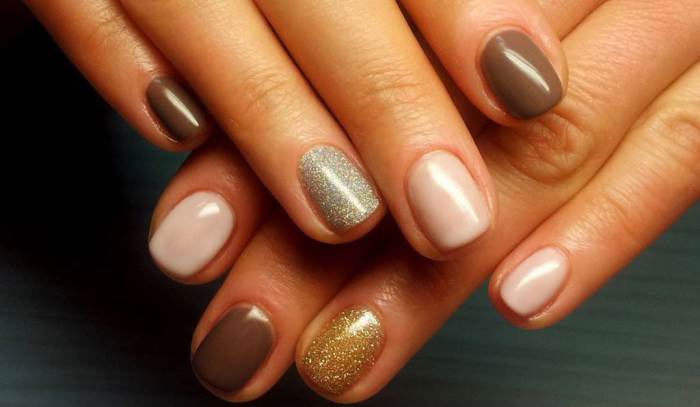
Emphasis on rubbing
The sparkling rub looks quite bright and not all young ladies can afford to show off such a manicure on weekdays. To at least somehow revive the handles - choose neutral tones of varnish and cover one or two nails with shiny microparticles. Simple but tasteful!
Kamifubuki
Something like confetti. And besides, it is easily combined with a sparkling rubbing. To make the manicure look unusual, but at the same time bright, you need to apply kamifubuki only on 1-2 nails, and let the rest shine with pigment.

Mirror jacket
To give the manicure elegance, make a beautiful and delicate jacket. You can look and choose a beautiful color combination.
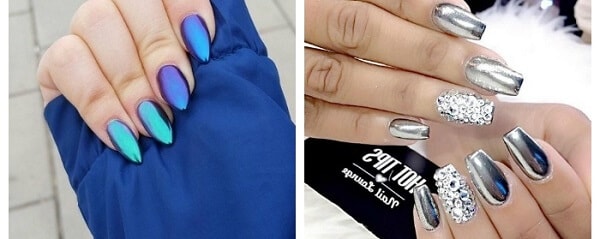
double shine
If you are a lover of rhinestones, then you can safely stick a few beautiful pebbles to match the manicure on any nail. This decor will look impressive.
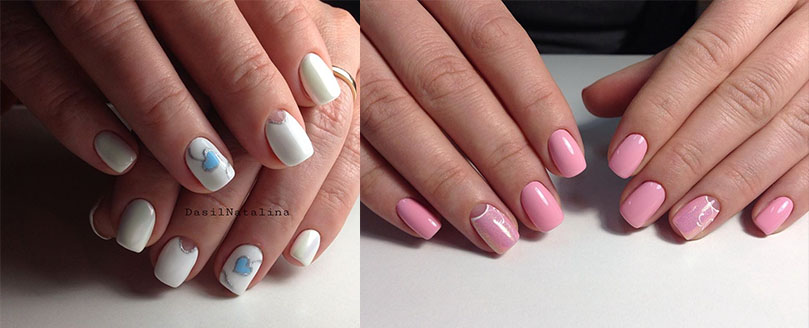
Beautiful drops on mirror nails
This effect can be achieved using two techniques - rubbing and drops. Suitable for bold and extraordinary girls.
![]()
Real reviews
Lyudmila. I recently learned about mirror manicure, and immediately went to my master for a new idea. I did a burgundy manicure, it looks unrealistically cool. Only this service is a bit overpriced. And everything is so cool!
Masha. And I decided to experiment with rubbing. Bought online 3 different colors and got to work. I’ll say right away that for the first 50 minutes I suffered a little, but then, having chosen the right color combinations, I immediately got a bright design. I like the final result, at least unusually. Beginners should definitely watch the video, otherwise it's a little difficult to understand the whole application technology. Here is a photo of my manicure.

Katerina. And how much does one bark cost and where can I get a brush?
Mariana. Incredibly cool idea for a party. Rich, bright and beautiful! Only I think you need to do such a manicure on long nails. I have short hair and looks average.
Tamara. I decided to try to make a mirror design myself. Just wasted time and money on boxes, nothing sensible happened. It is better to save money, go to the master and get a quality manicure. And so I liked the idea, stylish and unusual!
Step by step manicure instructions
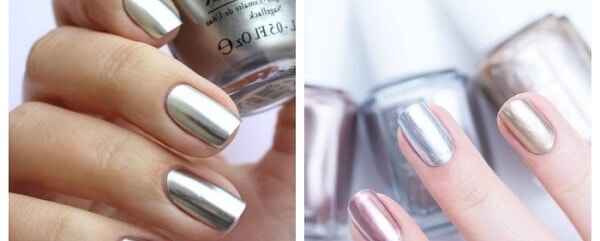
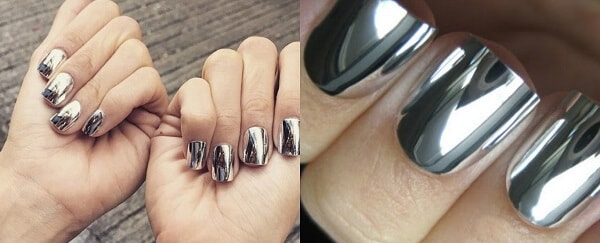
You have probably noticed by now that recent times more and more often you can meet women whose fingers adorn mirror nails. This is not surprising, because the popularity of manicure with a metallic sheen this year continues to grow steadily. Both young girls and mature ladies decorate their nails with a mirror manicure before going out. Although the most common are golden or silver glitter nails with a fashionable design, there is always the opportunity to choose any juicy, rich shades and an unusual texture of a manicure coating with a mirror effect for your wardrobe.
More recently, mirror nails were made using a special thin foil. A thin layer of varnish is applied to the nails to match the color of the foil, glue is added to this dried layer, and then the foil is gently smoothed on the adhesive coating. In addition to foil, you can use nail polish or gel polish with a mirror effect, which include the smallest reflective components. A manicure with a unique metallic sheen and a variety of shades can be done using varnishes from companies such as Zoya, Chanel, Opi, El Corazon, as well as gel polishes (Shellac, Layla, Brigitte Bottier). Glitter nails can be done quickly with a slider design by selecting the appropriate stickers.
But now to fulfill fashion manicure with irresistible brilliance, the so-called mirror rub is used, which is finely ground aluminum powder or polyester dust. The mirror pigment is rubbed into the gel-based coating and gradually your nails acquire a chrome, truly metallic sheen. We want to note right away that the huge popularity of the mirror rub is explained by the fact that its reflective properties on the gel nail coating are many times superior to the shine of the foil and even the most expensive gel polish with a metallic effect.
From this material you will learn how to make at home mirror manicure using foil or by rubbing the chrome pigment into the gel coat. Visual video tutorials and a step-by-step master class with photos will help you learn how to properly apply a mirror rub on the coating layer (gel paint, color gel polish or top coat) of natural or extended nails.
▪ UV lamp for polymerization (drying) of gel polish coating and clinser for removing the sticky layer;
▪ Silicone brush or sponge, stick with rubber tip;
▪ Soft brush or nail brush;
▪ Degreaser;
▪ Gel or gel polish of the desired color (taking into account the color of polyester dust);
▪ Mirror rubbing of a suitable color;
▪ Top (finish) coating.
Stepping through mirror effect manicure
❶ We give the nails the desired shape (now almond-shaped and oval shape for long nails and square with rounded edges for short nails are in fashion), level the surface as much as possible (grind the nails with a nail file) and polish with a buff. Apply base layer, dry in a UV lamp, and then apply several thin layers of gel polish and dry each; 
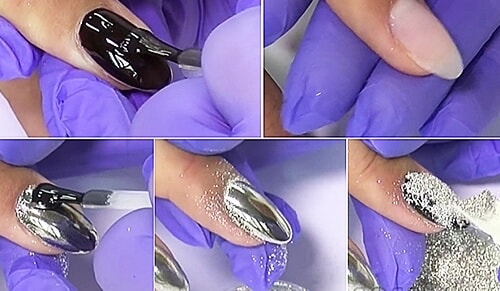
❷ After removing the sticky layer with a clinser, evenly pour pigment for shine on the nail, lightly slap it with your finger and rub it with a sponge, without pressing hard. Along the edges, it is easiest to rub the pigment with a stick with a rubber tip; 
❸ Now you need to very carefully clean the mirror surface of the nail from excess powder particles with a soft brush in order to achieve a uniform metallic sheen after the finish coat; 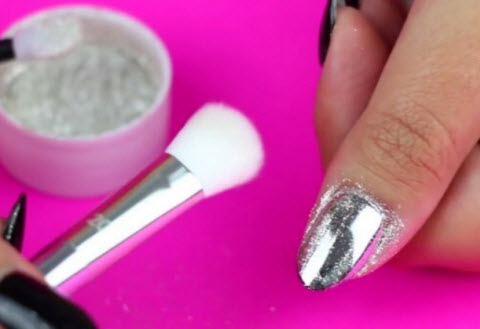
❹ Then you should carefully file the free edge of the nail with a nail file, removing excess pigment and leveling the nail plate. Having processed the end of the nail with a nail file, we seal it; 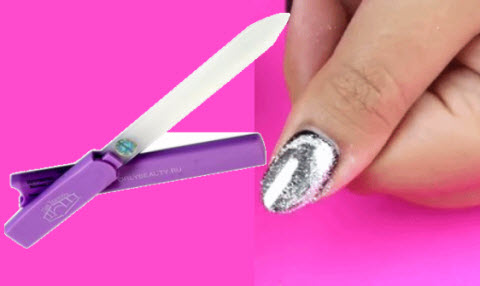
❺ Now apply a thin layer of top coat. Pay attention that there are no rubbing particles on the brush; 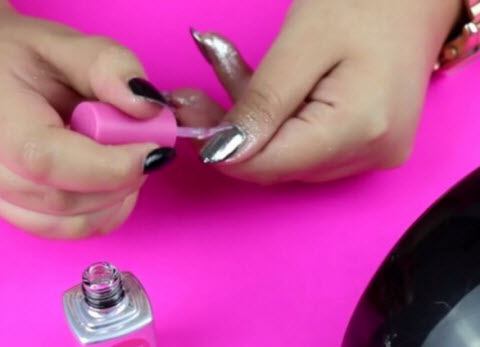
❻ It remains to polymerize the top in a UV lamp. If the mirror shine on the nails is not uniform enough, cover them with another layer of rubbing and seal again with a top coat. Then re-polymerize. ![]()
Result:

By the way, the metallic sheen of fashionable manicure is in harmony with mirrored glasses :)
♦ USEFUL TIPS FOR PERFORMING A MIRROR MANICURE AT HOME
If possible, use a self-leveling gel polish under the mirror rub, as any irregularities in the coating will be evident after rubbing in polyester dust. Although the usual shellac of the chosen color will do quite well, but be careful not to leave bubbles and tubercles on the gel polish layer;
To keep the mirror shine as long as possible, choose gel polish for rubbing, taking into account whether extended nails or natural ones;
Rub the pigment with a metallic sheen in several layers on a dark-colored coating, as the rub lays down in a thin layer and shines through;
Before rubbing the mirror powder, it is necessary to thoroughly dry the applied layer of gel polish (the polymerization time can be doubled);
Instead of gel polish, you can use a special gel for rubbing and apply it in a thick layer, evenly distributing it over the nail plate;
Stir the gel polish with a brush and shake the bottle well before applying the next layer to the nail so that the components of the contents of the bottle are evenly distributed;
It is also allowed to rub powder on a high-quality top coat (top) to give the nails a metallic sheen. It is advisable to use a top without a sticky layer or dry the coating in a UV lamp several times longer;
It is quite difficult to rub the pigment onto the sticky surface of the gel polish after polymerization, as the dispersion layer begins to roll into lumps. To facilitate the procedure, remove the sticky layer with a clinser and the powder will lie as evenly and firmly as possible;
Before applying the top coat on the gel polish, slightly file the end with a glass manicure nail file and seal it well with the top;
To make the perfect mirror glitter nail polish, use suitable tool for rubbing. It is convenient to apply the pigment with a silicone brush, eye shadow applicator, sponge, and along the edges of the nail, you can gently rub the powder with a stick with a rubber tip;
When rubbing polyester dust, do not be too zealous, as you can remove the pigment already adhering to the coating;
Having finished distributing the mirror rub over the entire gel coating, be sure to shake off all the excess, because when applying the top, you can easily hook these pigment residues with a brush and you will get a manicure with separate highlights instead of a perfectly even mirror shine on the nails;
To prevent shiny particles of polyester dust from getting into the jar with the top, transfer the amount of product needed to cover the nails to the palette and pick up the top with a brush to seal the nails from there.
♦ HOW TO MAKE QUICKLY MIRROR MANICURE WITH FOIL
- click on the photo and expand the master class
♦ FASHIONABLE NAIL DESIGN WITH MIRROR GLOSS
On the picture: interesting ideas modern nail design
♦ VIDEO TUTORIALS FOR BEGINNERS
there is never too much, and the nail industry annually presents to our attention all new types of sparkling pigments for irresistible nails. Today we will introduce you to another novelty that won the hearts of ladies of all ages.What is a pearl rub for nails.
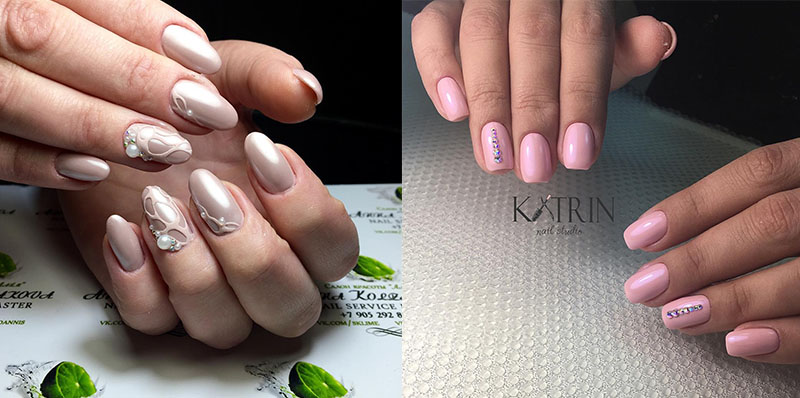
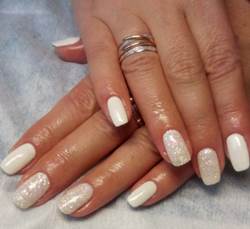
Pearl rub is a spectacular novelty for decoration and has become incredibly popular among bridal designs in 2017. Its feature is in soft, gentle and noble radiance inherent in natural pearls. Ultra-fine grinding into microfine dust provides ease of application, no clumping, and even glow under the light source.
Visually, on the coating, it looks sophisticated and feminine, without a vulgar, deliberate mother-of-pearl. That is why the novelty has become very popular among girls who prefer modest but elegant nail decoration. Romantic shades beautifully emphasize the elegance of the hands and the shape of the nails, look stylish at any length and look appropriate in designs for any age.
How to make a manicure with pearl pigment on varnish and gel polish.
Superfine airy pearl powder is weightless like ashes, so when creating a manicure on any type of coating, it is absolutely not capricious. When applying, you can use any method convenient for you -, or a finger in. The result in any case will look magical. To create the effect of natural delicate pearls, apply decor on a white substrate, and to experiment with a shade and halftones of pollen - on a black or colored one.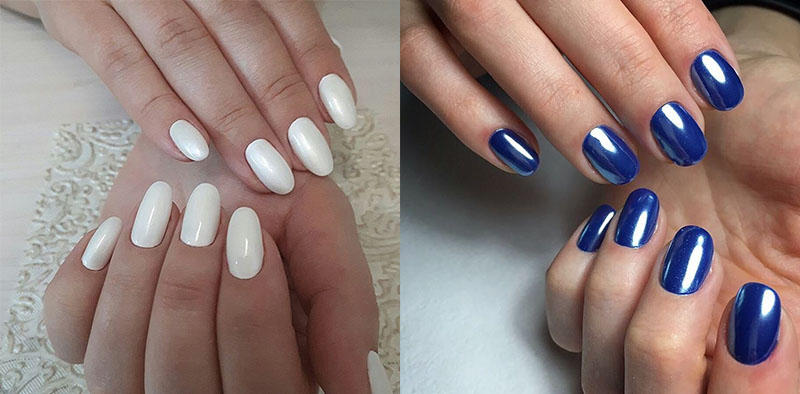
Applying over regular varnish
- Carefully polish the nail plates to a shine with a special file-. Carefully work out the edges of the nails, tidy up the cuticle and side ridges.
- In the presence of aesthetic defects (hollows, grooves), it is necessary to align with special bases ().
- Cover the nails with the background color and dry it thoroughly until it is slightly sticky (but so that the base does not smear when touched).
- Over a sheet of paper, thickly apply a rub on the nails, smoothing and polishing movements away from you. Do not apply too much pressure to avoid damaging the base coat.
- Remove excess pollen with a fan brush, coat nails with a glossy effect and dry thoroughly.
Application on gel polish
- Perform a hardware or trim manicure, carefully polishing each nail.
- Apply a very thin layer, carefully work out the ends of the nail (fix).
- Coat your nails and dry it under according to the manufacturer's recommendations.
- and rub the pearl pigment evenly over the nail. Reapply as needed for a more intense effect.
- Cure the layer under the lamp (60 seconds in UV and 30 seconds in LED machine).
- Apply with a gloss and re-cure the design.
If you want to create a very neutral and calm look for your everyday outfits, the pearl pigment can be rubbed directly into the gel polish top. Just be sure to choose for the correct execution of the manicure.
Rules for the durability of design with pearl powder.
Each nail art with pigments has its own secrets that you need to know so that the result will please you as long as possible and to the fullest. When applying pollen as a decor to your favorite color of varnish or shellac, remember:- Sprinkle the pigment generously on your nails and do not save, otherwise the shimmer will be too muffled and not expressive.
- pearl pigment due lung effect light scattering is not so critical for a smooth surface of the nails, but it is still very important to carefully polish the nails.
- You should not experiment with a matte top, even as a pattern through the pigment. It will erase the effect of impeccable gentle radiance, deprive the design of all its charm.
- For a flawless look with pearls, massage Special attention cuticle area. If necessary, rub the pigment with a flat brush or cotton swab.
- Some nail masters practice an interesting life hack when working with this pigment: before applying the top coat, they cover the polymerized rub with one layer. And slightly file the free edge of the nail with soft.
- You should not apply the pigment to the nail with a finger pad (without a glove), as particles of sebum will remain on the surface, which can affect the wear of the image as a whole.
Pearl glitter nail design, photo.
Rubbing pearls, like a nail design, have seriously pushed the classic white jacket off the pedestal of the most popular design “both to the feast and to the world.” Brides also pay tribute to him, as pearl nails elegantly emphasize the romance, innocence and femininity of a girl on her special day. However, even with a strict dress code, pastel wardrobe and the habit of wearing a simple and modest manicure, mother-of-pearl dust is relevant and acceptable. It will look especially expressive, of course, on nude shades. But even on the basis of color, you can present this decor in a very interesting and stylish way.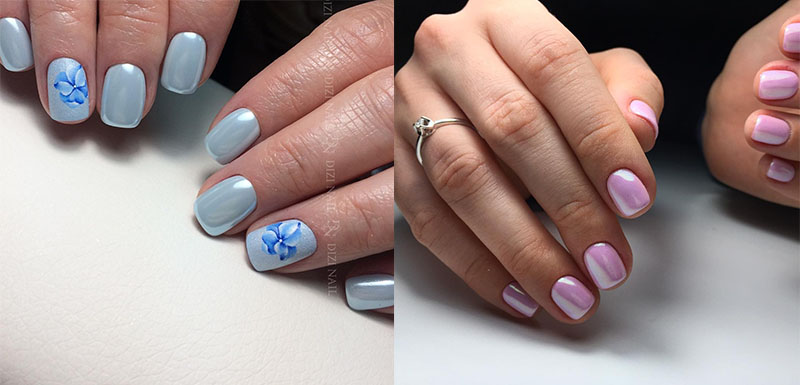
Consider the most popular types of nail art with pearl pigment.
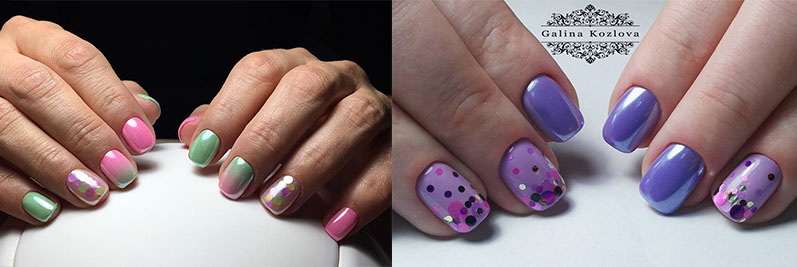
- Monochromatic manicure. The easiest to perform, the solo look looks equally impressive and spectacular on both short and long nails.


- Accent. You can decorate with pearls as one or a pair of nails, or apply it to the coating through a stencil.
- Drawing (painting). Incredibly beautiful pearlescent pigment looks applied to the painting with gel polish or. Or as a basis for elegant monograms or thematic drawings.
The trend for a duet of gloss and velveteen is also relevant in the case of pearl decor. It turns out a visual stylization of an outwardly simple and unpretentious “shell” and pearls shining around it.
- Stones, rhinestones, bouillons. A chic, sophisticated, luxurious manicure is, of course, sparkling crystals on the coating. Both on individual fingers, and in the form of droplets on each nail. The duet of pearl dust and () is especially relevant for evening looks. The main thing is to observe the measure!
A combination of color flashes of sequins ( , ) and a pearl base or broken glass edges () on a rubbed canvas looks stylish, creative and interesting in the design.
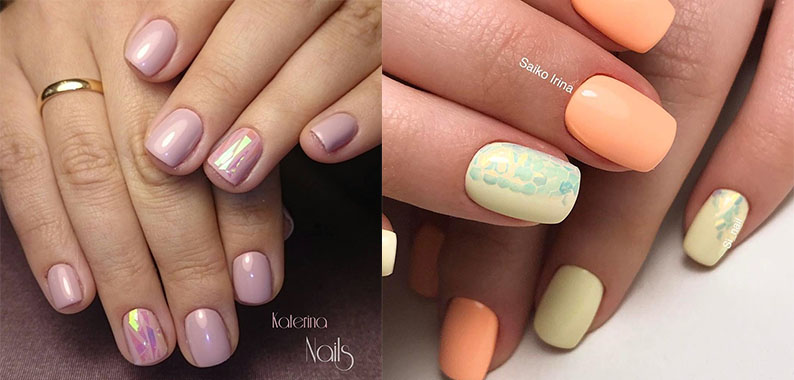
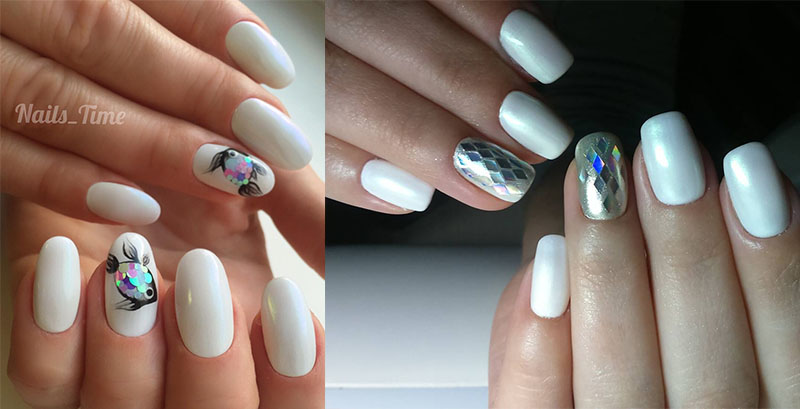
Classical French manicure or tender moon design are also very attractive visually, being embellished with pearl pigment. This is the ideal solution for those who do not accept or different reasons cannot wear complex nail-images. One of the latest trends has been the use of pearl dust for negative space designs (with an unpainted moon or a pattern on a “bare” nail).
Another popular way to add a special charm to a manicure with a shining mother-of-pearl pigment is to create the effect of raindrops (dew). Volumetric transparent droplets give the image as a whole a special irresistibility and a desire to touch and admire such beauty for a longer time.
As you can see, the field for experimenting with the novelty is quite extensive and without strict restrictions. The main thing is not to rush, follow all the recommendations when creating an image, and you are guaranteed a stunning result!
Video: the secrets of working with rubbing on gel polish.
If you are new to working with rubs in general and want to see more clearly how to create such designs correctly and beautifully, our instructional video will help you. The principle of operation and handling of the master class video hero and pearl pigment are similar. The presentation will help clarify everything possible questions on manicure with the participation of rubbing for nails.
Now you know absolutely all the chips and secrets of the pearl novelty. We hope we were able to tell you all the most interesting and useful for a creative manicure with her participation!
You can buy a pearl rub for nails at.
The pigment is interesting material to create a creative design using gel polishes. It looks like sand or starch.
Coloring matter in the form small particles may have a size from 5 to 180 microns. These particles easily lie on the nails in a thin even layer.
Pigments can have the most different shades- from mother-of-pearl and matte to transparent with original tints. They can be safely mixed with each other, as well as added to gel varnishes to obtain unusual shades.
Manicurists do not accidentally have several options for pigments in their arsenal. different colors.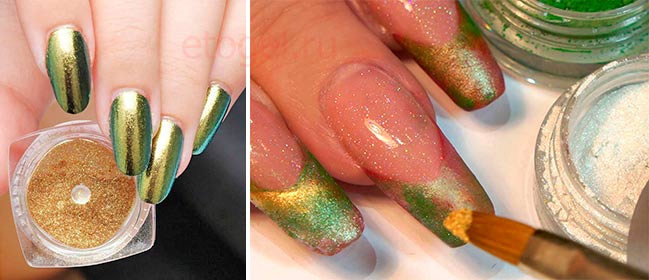
They love them for their special properties:
- particles are securely held on the surface of the nail,
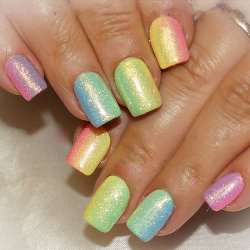
- the ability to get a rich deep shade, as well as easily create a gradient design that is popular today,
- versatility - pigment particles of different colors are easily mixed with each other and open up opportunities for creating the most complex design,
- resistance to external influences– manicure with gel polish will last at least 2 weeks,
- affordable price and minimum consumption - the cost of one jar is about 50-60 rubles, but it will last for a long time.
What you need to apply a design with pigments on gel polish
Types of pigments
According to the structure, the following types of dyes are distinguished:
- Liquid - allow you to get a uniform coating without streaks.
- Dry - crumbly particles are not so convenient to use, but much cheaper and more accessible. These are the ones most often used by nail art masters.
They are also classified into groups such as:
- Natural - they are obtained by mixing mineral rocks.
- Synthetic - created artificially.
- Metallic - formed by mixing alloys and metals.
Cosmetic pigments can be both one-color and with different overflows. You can also purchase materials with a chameleon effect.
What is needed for work
In addition to the dye itself to create unusual design you will need:
- mixing container (you can take a glass jar),
- spatula for a set of pigment from a jar,
- brush for design
- UV curing lamp,
- if desired, you can take acrylic powder for further mixing it with the pigment.
VIDEO INSTRUCTION
Techniques of use
There are several techniques for using coloring particles. All of them are actively used by masters in beauty salons, and are also available for use at home.
- The first option is to mix them with a top coat. It is necessary to mix in equal proportions, apply to the nail plate and polymerize under the lamp.
- The second option is to apply directly on the sticky layer of gel polish. You can apply it both on the base and on the color coating. Dip a dry brush into the pigment and spread the coloring particles over the entire surface of the nail or part of it with gentle patting movements. The result is fixed by the top.
You can mix pigments with acrylic powders.
- To do this, pour three parts of transparent powder into a container, add one part of the pigment to it and mix.
- We apply a small amount of monomer to the nail, pick up a little of the resulting mixture with a brush, gently apply and distribute over the nail plate.
Instructions - rubbing pigment into gel polish
We prepare the nail plate - we perform a manicure. We apply the base, dry it, then a layer of gel polish, again send it to dry.
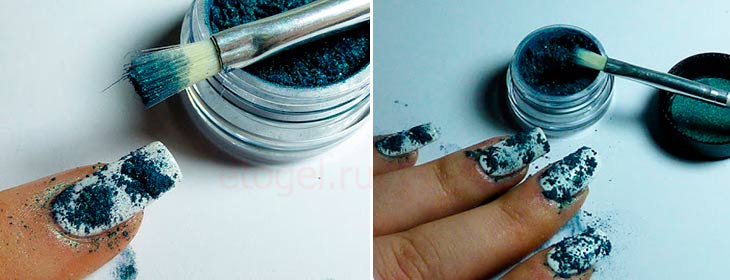
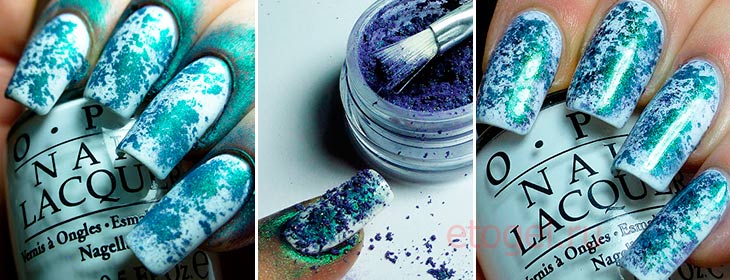
We collect the pigment with a brush and apply it on the nail in a chaotic form with gentle tapping and rubbing movements. We wipe the brush to shake off the excess, and pick up a different color. Rub again next to the pigment of the previous color. Gently go through the joints between the two colors. With a finger, gently rub the pigment into the nail. Shake off excess from the nail with a brush and place under the lamp. In our example, the nail ended up with a design with two colors, but you can use one or, conversely, more.
Shake off the remnants with a fan brush. Apply the top and dry in the lamp. Remove the sticky layer and enjoy.
VIDEO DESCRIPTION
- Don't use cheap material. Chinese made. In most cases, it does not meet the security requirements.
- You can correct the pigment applied to the nail with a cotton swab moistened with nail polish remover.
- If the pigment is needed to create a pattern, then draw it on top of the gel polish with the sticky layer removed - so the pigment will remain only on the stickiness of the pattern.
- No more than 5% of the coloring matter can be added to the gel, otherwise it will not be possible to qualitatively polymerize the coating. In the case of acrylic, the figure can reach 50%.
Be sure to purchase at least one jar of pigment and try using it to create a bright manicure!
Rubbing glitter into gel polish - simple technique, allowing you to create a beautiful manicure.
It gives nails extra gloss and mirror shine. There are no restrictions on shades, so you can fully use your imagination.
As a result, a glitter manicure will complement both everyday and festive looks.
Rubbing glitter is one of the additional steps in creating a gel polish manicure. For successful completion of the procedure will need:
- manicure set (nail file, nail scissors, buff);
- cuticle remover;
- primer;
- degreaser;
- base;
- color coating;
- top coat;
- clinser;
- lamp;
- brush;
- crumbly small sequins;
- oil.
Step-by-step instruction
 First you need to prepare your nails. Glitter is applied to the gel polish on one of final stages. It is important to follow the technology of the procedure in order to get a lasting and beautiful manicure.
Step-by-step instruction:
The surface of the nail should be smooth. The glitter rubbing technology is broken if the surface is slightly rough or bumpy.
 The main condition for rubbing glitter is a perfectly even and smooth surface of the nail.
Chrome plating emphasizes any irregularities, roughness and bumps. Therefore, it is first necessary smooth the surface of the nail plate.
The workplace must be clean. The ingress of dust, specks and any other particles can adversely affect the quality of the manicure.
You also need to make sure that there are no villi from cotton wool and special discs on the surface of the nail plate. Often they cling to the end of the nail.
It is not necessary to apply glitter to all nails. You can decorate only one or two fingers of each hand, or even one. But it is worth considering that it is recommended for glitter apply colored, and preferably dark varnish. So the shine will be more pronounced. On the rest of the nails, you can apply varnishes of any shades.
The gloss will be softer and more delicate if you use varnishes in neutral nude shades. The best option - beige color.
 But you can do without varnish. Then you need to apply glitter on the base layer.
Durability of manicure depends on the thickness of the varnish layer. Slim or middle layer It fits well on the nail and dries completely in the lamp.
Too dense a layer can dry out poorly, be unevenly distributed or spread. Such a manicure will not last long.
It is better to apply several thin layers of varnish than one thick one.
You can apply the usual top coat for gel polish on the rub. However, it is recommended to use top for slider design. It is worth considering that the coating should be glossy. Matte top will hide shine and shine.
Advantages and disadvantages of manicure
 The main advantage of rubbing glitter into gel polish is mirror shine, which enhances the glossy top coat.
Subject to the technology of the procedure, sparkles will increase the durability of the manicure.
The main thing is not to apply thick layers of varnish and rub. Otherwise, the opposite effect will occur.
The main disadvantage is high flow. Especially during the first applications, when it is difficult to accurately and evenly distribute the shimmer over the surface of the nail. But if you spread a piece of paper, the sparkles will not fall asleep workplace. You can also carefully pour them back into the jar.
