Simple pedicure at home. Manicure pedicure - what is the difference between design and execution technique
They say that well-groomed woman starts with well-groomed hands. Agree that such an opinion would be fair in relation to women's feet, in particular pedicure. Although we wear open shoes mainly in the warm season, this does not mean at all that care for the feet and toenails is necessary only during this short period. In fact, every self-respecting lady should follow the beauty and accuracy of a pedicure. all year round. Experts recommend putting your own legs in order at least once every 10-14 days. This mainly concerns summer period. In winter, you can limit yourself to one procedure per month. Many girls have skills self-fulfillment pedicure and I must say that this is quite justified. Learning how to maintain perfect legs without the help of a specialist is not difficult at all. In this article, we decided to introduce you to the intricacies of doing a pedicure at home. By mastering the technique described below, you will forget about the roughness of the heels, and your fingers will have a neat appearance anytime, anywhere.
Classic (edged) pedicure at home: stages and technique
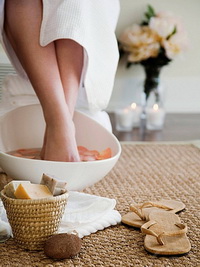
To date, there are several pedicure techniques - hardware, European or French, SPA-pedicure and traditional edged. If we talk about the procedure at home, then for this purpose the classical technique is most often used. It includes the following steps:1. Steaming the legs
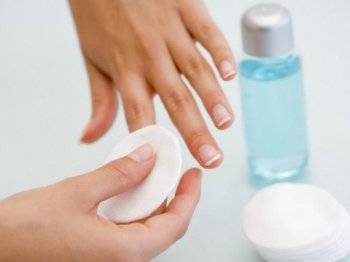
Remove from nails first old varnish, and after that, take up the preparation of your legs for a pedicure. To do this, you need a special bath with warm water and detergent composition. The easiest and most affordable option is shampoo or shower gel. However, you can purchase ready-made cosmetics that effectively soften hardened areas of the feet and, moreover, have an excellent antibacterial effect. If you decide to prepare a bath yourself, in addition to soap suds, add 2-3 tablespoons to the water. sea salt or drinking soda, as well as a little decoction of chamomile, calendula, oak bark or sage. By the way, freshly squeezed lemon juice will perfectly cope with tired legs. In general, 5-15 minutes is enough to soften the skin of the feet. If during this time the bath begins to cool, periodically pour water into it. warm water. After steaming, wipe your feet with a dry towel and proceed to the next step - removing the keratinized skin of the feet.
2. Hygienic treatment of feet
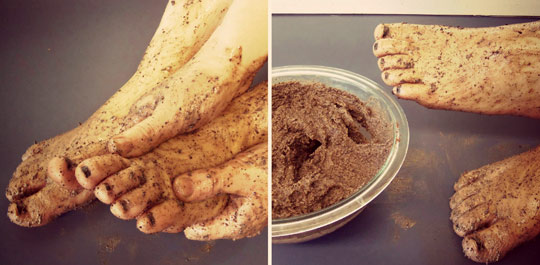
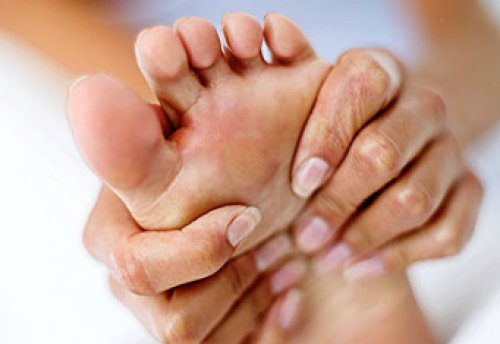
A proper pedicure is almost impossible to imagine without perfectly smooth heels like a baby's. Therefore, their processing is paid no less attention than nails. For mechanical cleaning of the feet, use a pumice stone or a special cosmetic file with a fine grain of abrasive. Since coarser files can remove excess skin and cause excessive heel growth, they are more suitable for salon use by professional pedicurists. To achieve maximum smoothness of the feet, file them first from top to bottom, and then in reverse direction. A specialized peeling or foot scrub will help to consolidate the result. Such funds belong to the category of antifungal. In addition, they are antiperspirants and relieve puffiness quite well due to the plant components they contain. An alternative to a purchased exfoliant can be a homemade exfoliant. It will not be difficult to get it: just mix the body cream with a small amount of coarse sea salt, and then use the composition for its intended purpose. After carefully treating the feet, rinse them with warm water and dry with a towel. Now is the time to moisturize the legs with a nourishing cream, accompanying its application with a light, relaxing massage.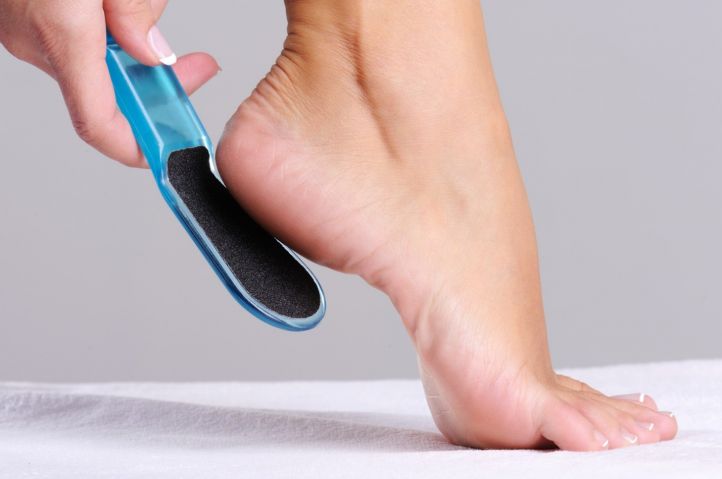
3. Nail and cuticle treatment
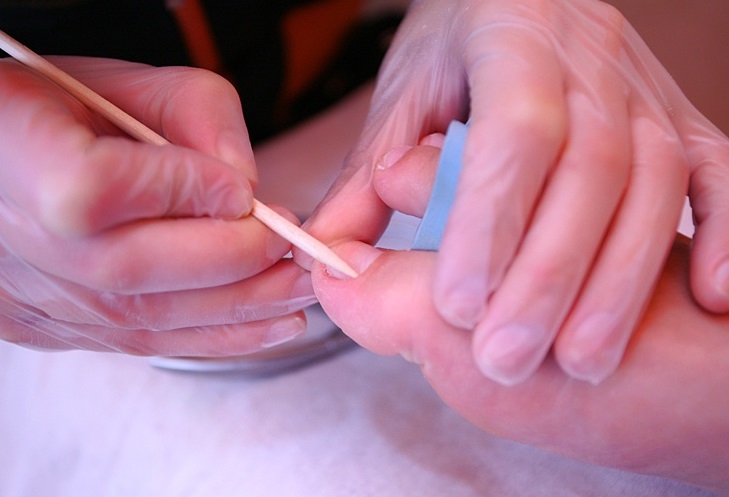
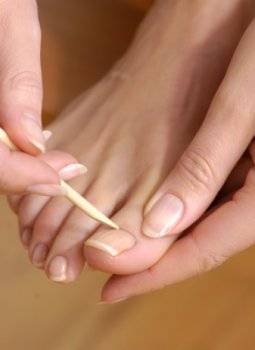
Start by removing dead cells and dirt accumulated under the nails with an orange stick or a special spatula. Next, adjust the length of the nail plates using nail scissors with rounded ends and a cosmetic nail file. If you did not have time to get a good nail file, then take note that glass-based nail files are considered the highest quality. They not only do not exfoliate the nails, but also allow you to grind their edges quickly and evenly. Trim and file the nail plates from the corners to the center, keeping in one direction. To avoid such an unpleasant nuance as ingrown nails into the skin, try to give them only square shape without rounded corners. As for the length, one rule applies here - nails on thumbs should be slightly longer than all the others. After working on the length and shape of the nail plates, start processing the nail bed. Apply a special softening agent to the cuticle and after a couple of minutes remove it with an orange stick or a manicure spatula. Very often, dry, rough skin is present on the corns and fingertips. It also needs to be disposed of using a nail file. The final step to this stage- nail polishing. A suede buffer file with 4 working surfaces will help to cope with this task. varying degrees rigidity. Thanks to its effect, the nail plates will become perfectly even, shiny and will hold the varnish much better.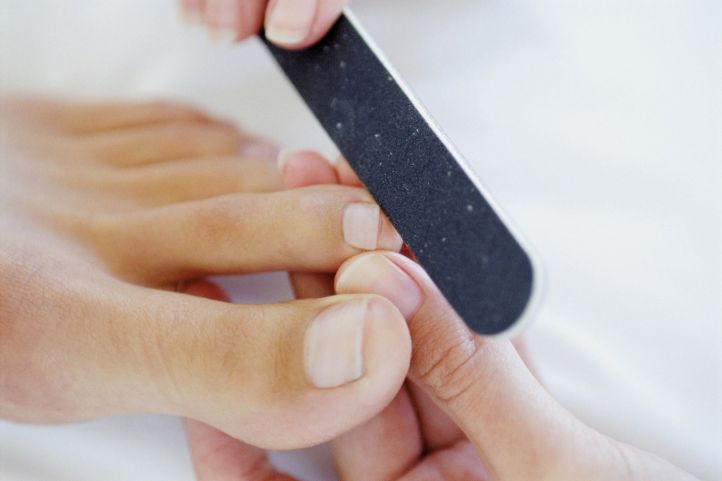
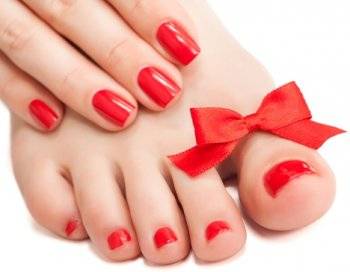
4. Nail polish
The nail polish finishes the foot care event. At this stage, you will need a special silicone finger separator (or cotton swabs), base polish, fixative polish, and any color polish of your choice. First of all, degrease the nail plates from the remnants of the cream and cosmetics nail polish remover without acetone. Then place your fingers in the separator and proceed to alternately apply all layers of varnish. The first will be base layer colorless base, which performs the function of leveling the nail plates and prevents them from yellowing. It will be followed by one or two coats of colored varnish and the color scheme of the nails will be completed with a fixative coating. Remember that before applying each subsequent layer, the previous one must dry well. If at the end of the procedure there are traces of varnish on your fingers or outside the nail plates, carefully remove them with a cotton swab treated in nail polish remover.
As you can see, to organize a mini-salon right at home, you only need a small set of skills and, of course, desire. Pay due attention to your legs and do not forget that they deserve to be beautiful 365 days a year!
Photos: Formula-tila, Nailsplanet, Nebula, Spa-resort-sanssouci, Ponsuke2
A pedicure is a very important procedure that many women do. Most year, due to the not very mild climate, you have to walk in closed shoes, but still you should not forget about your legs. Well-groomed skin and high-quality pedicure help to please yourself and everyone around. In the warm season, this procedure can be called necessary, because thanks to it, legs in sandals or flip flops will look attractive.
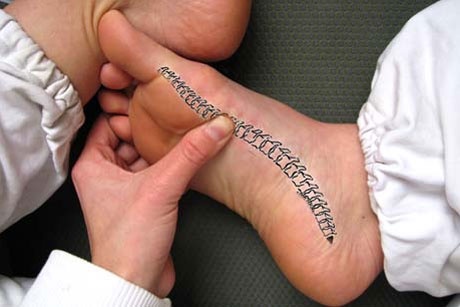
Well-groomed legs have a pretty appearance and also affect the health of the whole organism. Eastern Wise Men they say that in the area of \u200b\u200bthe feet is concentrated a large number of nerve endings going to the organs. Therefore, the removal of skin growths on the feet makes it possible to cleanse the body, give it additional freedom.
A well-groomed, attractive foot is a kind of pledge of health, positive mood and self-confidence. However, despite this, many ladies neglect pedicure for unknown reasons, for example, due to lack of time. But do not discard this important procedure, because now it is quite possible to do a high-quality pedicure at home. There are all possibilities for this. It's easy to pick up the tools, set aside some time, and get your feet in great condition.
What can be useful for a pedicure at home?
To do everything correctly and as efficiently as possible, you need to prepare some tools. Usually this list is not so big, but all the devices there are really useful.
Proper preparation of the legs for the procedure
Before you start, it is advisable to properly prepare. Gotta get the old nail polish off. It is better to use a liquid that does not contain acetone for this, because it is more harmless and gentle. It is easy to find special fortified liquids for these purposes, which strengthen the nails. After that, you can proceed to the pedicure itself.
Leg toning
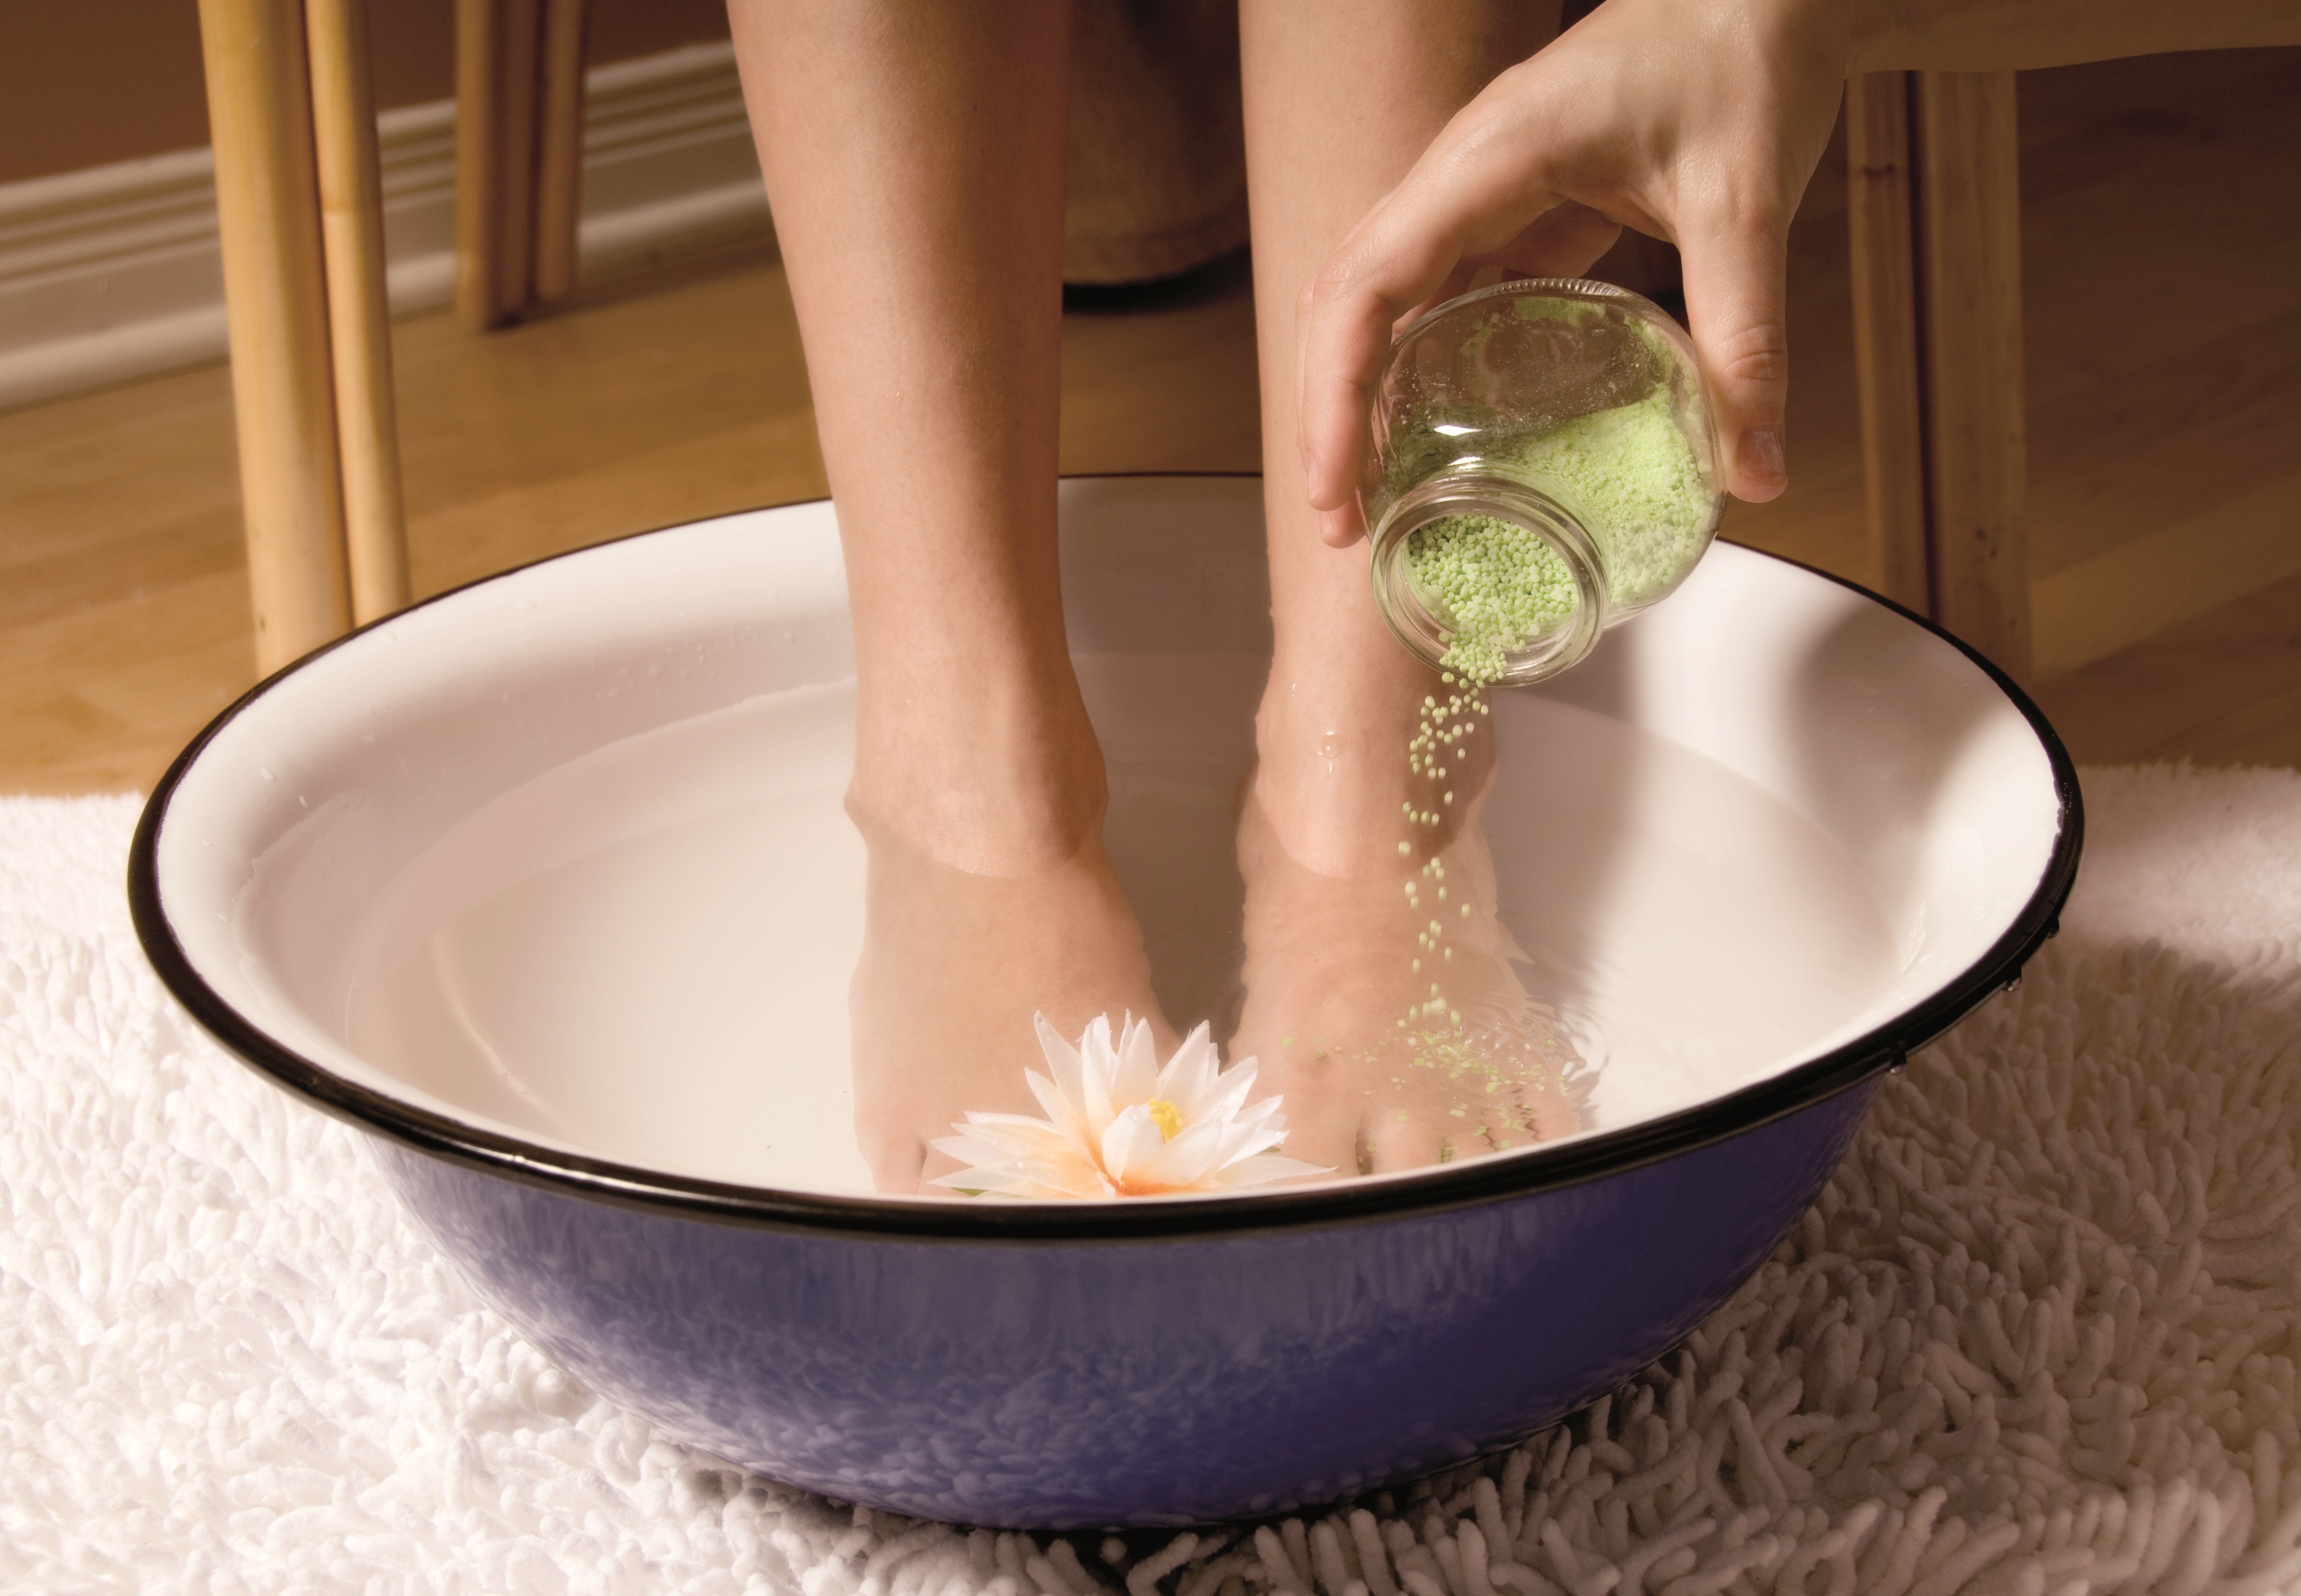
The first step is to fill the container with warm water. There you can add a couple of drops of tea tree essential oil, lemon and a little soda. Sometimes a couple of spoons of coffee are added there. Then you need to lower your legs into this container and hold for about fifteen minutes.
Cannot be used for bath too hot water because there is a risk of burns.
Gently dry your feet with a clean towel. When they are dry, you need to replace a couple of teaspoons of white clay in olive oil and spread it all over the cuticles on your feet.
As a scrub, you can use a composition of olive oil, sea salt and lavender essential oil. All this is mixed and then the feet are massaged. After the massage, you need to wash everything off your feet with a simple cold water. Then the feet are wiped dry. They are wearing a mask. It contains an oily eucalyptus solution, oils and a little aloe vera extract. All components are mixed in one tablespoon in equal proportions. After fifteen minutes, use a napkin to blot all the remnants with a paper towel.
Massage with circular motions allows you to finally tone your legs. You need to do it from the ankles. After that, you need to put on socks and lie down for half an hour.
Relaxation of the legs
A bowl of heated water is collected, where a spoon is added vegetable oil, eucalyptus essential oil (seven drops), two tablespoons of soda and a little dried mint. All this is thoroughly mixed. Feet should be kept in such a bath for fifteen minutes. Then the feet are wiped, the cuticles are removed. You can push them away with a wooden stick. For lubrication, you can effectively use chamomile essential oil, which has a good antiseptic effect.
For a scrub, you can use olive oil, one hundred grams of oatmeal and orange oil. The feet are massaged with this mixture, after which everything is washed off with warm water. Then the feet should be wiped dry and lubricated with a pre-prepared moisturizing lotion. You can make it from a couple of tablespoons of glycerin, almond oil. A meticulous massage allows you to qualitatively relax your legs. The remaining lotion must be wiped with a napkin.
How can you relieve leg swelling?
A container with warm water is collected, to which three drops of essential oil of cedar, peppermint and a little dried rosemary are added. Feet in such a bath should be kept for fifteen minutes. After that, the feet are wiped dry, the cuticles are carefully removed and with a soft scrub. It can be made with olive oil and brown sugar (one teaspoon each). You can also make a scrub with ground coffee, olive oil, baking soda, and dried mint.
It is necessary to use only high-quality natural olive oil for the preparation of scrubs. Only it can give the desired effect. .
You can make a mask for the legs. To do this, mix with a blender one yolk, half an avocado, 10 drops of primrose essential oil and a spoonful of honey. The mask is applied for approximately 6 minutes, after which it is washed off with warm water.
You can use coconut oil to lubricate your feet. Then you need to put on cotton socks and you can go to bed. In the morning you can see noticeable effect, because the swelling will go down, and the legs will become much more attractive.
Video - Classic pedicure at home
The basic sequence of a home pedicure
- Sea salt is added to a bath of warm water. You need to put your feet there for about fifteen minutes. This will make the skin softer. Thanks to this, corns can be processed much easier. This should be done with a grinder or pumice stone. Scrub makes it possible to increase the effect.
- A direct transition to the nails, where the cuticles are pushed back with the help of an orange stick. There are special tools to remove it. Then you need to process the nails with a nail file. You should not round off the edge of the nail, because it can then grow into the skin, which is extremely unpleasant.
- The foot mask is next step. You can also do a wrap. Feet are rinsed and dried with a towel. To soften, you can make a mask of mayonnaise. It makes the skin softer. If you need to do something at this time, you can put bags or shoe covers on your feet. It is advisable to use the mask for about 20 minutes.
- On final stage home pedicure massage is done. Almost any oil can be used for this. The duration must be at least ten minutes. Then it is advisable to put on socks so that the feet do not cool down.
What can not be done during a home pedicure?
| What Not to Do | Causes |
|---|---|
| trim cuticles | Cuticles should not be trimmed because there is a risk of getting grass. If this is done ineptly, the cuticle will grow back extremely quickly after removal. |
| cut corns | It is forbidden to cut corns with scissors or other similar sharp objects. This is very dangerous. Therefore, you need to use only special scrapers, pumice or scrub |
| Cut corners of nails | It is better not to cut the corners of the nails, as well as not to cut them right under the root. This will prevent future ingrowth. It is best to cut them in a straight line. |
A responsible approach to the procedure at home and a clear implementation of the basic rules will always keep your legs in excellent condition.
In contact with
As many people know, accumulates under the nails the largest number bacteria and microbes.
Hands - business card a person, they should be neat and well-groomed, a manicure will help you with this.
Cleanliness and neatness of toenails is also very important, which will help you with a pedicure.
Today we will look at how to do a manicure and pedicure at home.
How to make a hygienic manicure
A hygienic manicure is a procedure that aims to give the hands a well-groomed appearance. Every self-respecting woman should take care of the beauty of her hands and nails. In rhythm modern life Not everyone finds time to visit a beauty salon. Therefore, if you know how to make yourself a manicure at home, your hands will always be healthy and neat.
So, how to properly perform a hygienic manicure at home?
A hygienic manicure should be performed once every one to two weeks in order to prevent thickening of the cuticle and contamination of the nails. Doing a manicure at home, you get not only the neatness and grooming of your nails, but also the beauty and health of your hands.
How to do a hygienic pedicure
Many women think that a manicure is more important than a pedicure, and they only remember it when it's time to put on open sandals. But this is a wrong assumption, a pedicure is just as necessary as a manicure, because the health of the feet is no less important than the health of the hands.
Consider step by step instructions carrying out the procedure of hygienic pedicure:
Properly performed hygienic pedicure prevents ingrown nails, fungus, corns, cracks and, of course, dirt. A hygienic pedicure should be performed every two to three weeks. As you can see, a pedicure at home is not difficult, but it brings great benefits to your feet.
How to make an original manicure and pedicure using varnish and rhinestones
Manicure and pedicure at home is simple and healthy. There are also ideas for creating an original manicure and pedicure using varnish or rhinestones. Let's look at both of these options below.
Manicure and pedicure with varnish:
Manicure and pedicure at home using rhinestones:
- Inventing a pattern or drawing for yourself with the help of rhinestones, otherwise there will be no time to change your mind later.
- We apply varnish - the base and, without waiting for it to dry, we apply rhinestones.
- We apply rhinestones with a needle or toothpick, trying not to damage the nail.
- After applying the rhinestones, you need to apply several layers of fixing varnish to make the surface smooth and even.
Do original manicure and pedicure at home is as easy as shelling pears, having the usual tools at hand. Read, watch your nails and come up with an original manicure and pedicure.
Perfectly manicured nails are a wonderful accessory. Nails can advantageously complement your image or, conversely, destroy it. Even if you look amazing and wear an Armani suit, peeling varnish or sloppy manicure will spoil the whole impression. Beautiful, carefully manicured nails will add to your self-confidence. Hygiene standards also require careful nail care: we do everything with our hands, and if dirt accumulates under the peeling varnish or under the nails themselves, it is quite possible to introduce an infection into food, etc.
Below we will tell you about manicure, pedicure and natural nail care.
For nail care you will need:
Cotton swabs or discs. It is more convenient to remove varnish with cotton pads, and the consumption of nail polish remover will be less. In addition, if you want, for example, to remove nail polish on your feet, but leave it on your hands, it is more convenient to operate with cotton pads: they absorb less nail polish remover and it will not flow over your fingers.
Nail polish remover. Liquids without acetone are preferred. They may not remove varnish so easily and quickly (especially cheap brands), but such a liquid will not harm nails, cuticles and skin.
Cuticle softener. Do not use if you have damaged cuticles. The product may contain harsh chemical substances. It is better to soften the cuticle in warm soapy water.
A container with warm water and a small amount of liquid soap. You can add a few drops of essential oils such as jasmine, tea tree or evening primrose. Such a bath will not only help to steam your hands, soften the cuticles and wash the dirt from under the nails, but will also have a relaxing effect. Don't add too much liquid soap, you only need a few drops.
Cuticle oil. Contains, as a rule, natural oils (for example, almond), vitamin E and other moisturizing ingredients.
Moisturizer. It will soothe and soften hands after a manicure. At night it is good to apply creams with alpha hydroxy acids, they stimulate natural processes skin renewal.
Nail polish, nail polish base, nail polish fixer. For natural nails, it is better to choose a varnish with a more gentle formula.
 And, of course, high-quality accessories for manicure and pedicure:
Nail files. Please note that nail files come in different hardness. The finer the hardness (abrasiveness) of the file, the softer it is. For natural nails, use files with a hardness of 180-240 grit (hardness units).
Cuticle spatulas. You can also use plastic ones, but for people with sensitive cuticles, we recommend those made from orange tree (it has bactericidal properties). Do not use metal spatulas - you can seriously damage the cuticle and nail bed. With a spatula, you can also clean the dirt from under the nails.
Manicure nippers or tweezers. In no case do not remove hangnails and excess cuticles with scissors.
Brush for cleaning nails.
Pumice stone or nail file. Use very carefully, only to remove upper layers rough skin. If you do a pedicure in the salon, it is advisable to refrain from this procedure altogether. As a result of the removal of calluses and hardened skin with a similar nail file, a wound may form, in which case it is easy to infect an infection, a fungus. Especially in the salon if the instruments are not sterilized properly.
 We do manicure at home
When choosing manicure products, pay attention to the products offered by the Mani Sation manicure line. It presents excellent facilities for skin and nail care.
Remove varnish. Apply nail polish remover to a cotton pad or swab and remove the polish from the base of the nail to the tip. Thus, the liquid will not get on the cuticle and you will save the latter from overdrying. If the varnish is difficult to remove, you can press the cotton wool soaked in the liquid to the nail for a few seconds, then wipe it off.
File your nails. Do this before soaking your hands in water. After water, the nails will become soft, they will be easily damaged. Do not use too coarse nail files and do not file the nails too hard from the sides - this will weaken them.
Soften your cuticles. Apply cuticle softener for 2 minutes (or as directed). You may feel a slight burning sensation.
Soak your hands in warm soapy water for about 4 minutes. No more is needed, otherwise the skin on the hands will wrinkle.
Gently lift the cuticles with a cuticle cutter. Do this very carefully so as not to damage the nail matrix (nail root). It is better to wrap the spatula with a soft cotton cloth.
Gently massage the cuticle and nail bed area with moisturizer. At the same stage, you can moisturize your hands, or do it after applying the varnish.
Remove hangnails and excess cuticles. Use special tongs for this. In no case do not tear off the barbs - this place will not heal for a long time. Be careful, blood vessels may be close to the surface. Make sure the tongs are sharp enough.
Sand your nails. Exists various tools for polishing and giving shine to nails. Be careful! Friction during grinding can cause a burning sensation.
And again, nail polish remover. It will help to remove the soap residue and other products that you have used before. This is how you create good foundation for varnish. Lacquer will lie more evenly and will hold better.
Apply the base under the varnish in one layer, moving from the cuticle to the edge of the nail. Let dry a little.
Apply varnish. Before use, shake the bottle with varnish so that it mixes and becomes homogeneous. Dip the brush into the varnish, remove the excess varnish by running the brush over the top of the bottle. First, apply varnish to the center of the nail from the bed to the tip, then make two strokes around the edges. Two layers will be enough. Of course, applying varnish requires some skill, but over time you will learn. Remove the varnish if it accidentally gets on the cuticle or skin.
Apply lacquer fixer. It will not only prolong the life of your manicure, but also add extra shine. You can renew the fixer every two days.
Use nail oil. Apply some cuticle oil with a brush. It is best to do this when the fixer is dry, otherwise the oil brush will get dirty in the fixer and then it will be difficult to remove it.
Last but not least, hand cream. Let the oil soak in and then moisturize your hands with a good cream or moisturizing lotion.
 Doing a pedicure at home
An extensive selection of pedicure products is offered by the Pedi Sation pedicure line.
Remove polish, if necessary, with nail polish remover.
File your nails. Attention! Trim and file toenails only with upper side. If you process the nails around the edges, you can get an ingrown nail. Needless to say, it is painful and ugly.
Remove cuticle residue. You can use liquid cuticle removers, special nail cutters or cuticle files. However, if you're going for a full pedicure, use only liquid cuticle removers and then soak your feet in a foot soak. soapy water enough to cover the feet. You can add a little sea salt, Epsom salt (magnesium sulfate), orange peel or essential oils, if you want to. Soak your feet for 10-15 minutes.
Remove calluses and dead skin. After the bath, dry your feet with a soft towel. Carefully use a pumice stone or foot file to remove rough skin and calluses. To avoid blisters, we advise (especially for those who work "on their feet" to choose special shoes with additional cushioning).
Remove excess cuticle. Push back the cuticles with a special spatula. Recall that this must be done carefully so as not to damage the nail matrix. Remove burrs if necessary.
Use a soft nail brush to gently remove excess cuticle residue.
Dry your skin and then lubricate your feet with lotion, foot cream, or shea butter (unless you are allergic to nuts or nut butters). You can do a light foot massage. After applying the cream, you can put on thick cotton socks (of course, if you are not going to apply varnish).
Wipe any remaining moisturizer off your nails with a cotton pad to create a smooth surface for applying polish.
Apply base coat. You can first separate your toes with the help of special separators (or you can simply use paper towels folded into a tube - wrap around each toe). Apply the base under the varnish in the same way as on the nails of the hands.
Apply the varnish in the same way as on the nails of the hands: one stroke in the center and two along the edges. A double layer will be enough.
Let the varnish dry slightly and apply a fixer.
Last but not least, cuticle oil. Do not forget - you need to apply when the fixative dries.
2010, . All rights reserved.
